Importing Delimited Device Files Into Microsoft Access
The Pipe-Delimited
| device files provide a relational view of the device record data. These files can be imported into a database for easier reading and interaction.
Notice
Directions
- Open a new database.
-
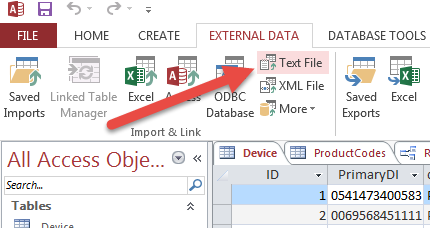
Open the External Data Tab in the ribbon, click the Text File button.
-
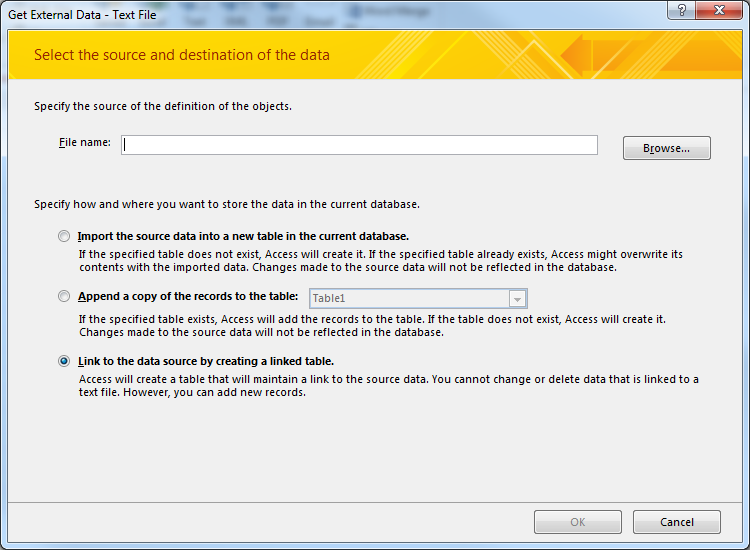
Click Browse and select the file you wish to import. Select Link to the data source by creating a linked table. Click OK.
-
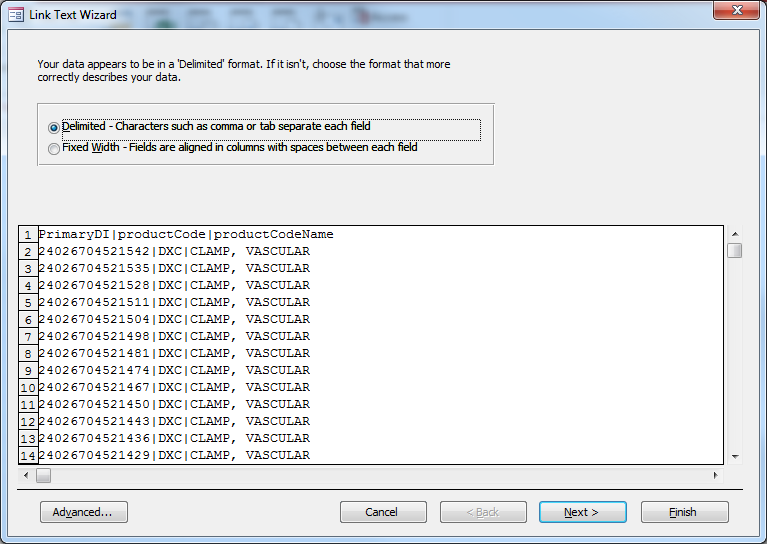
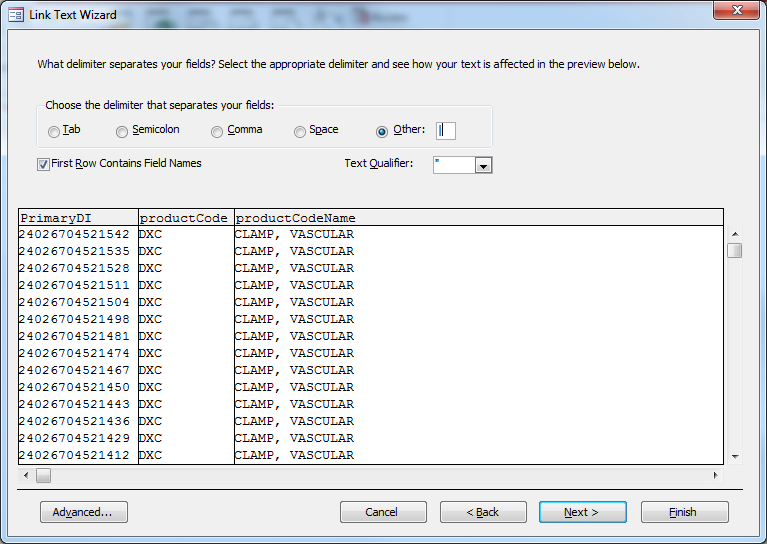
Select Delimited. Click Next.
-
In the Delimiters section, select Other and type
|. Check First Row Contains Field Names. Select"for Text Qualifier. Click Next.
-
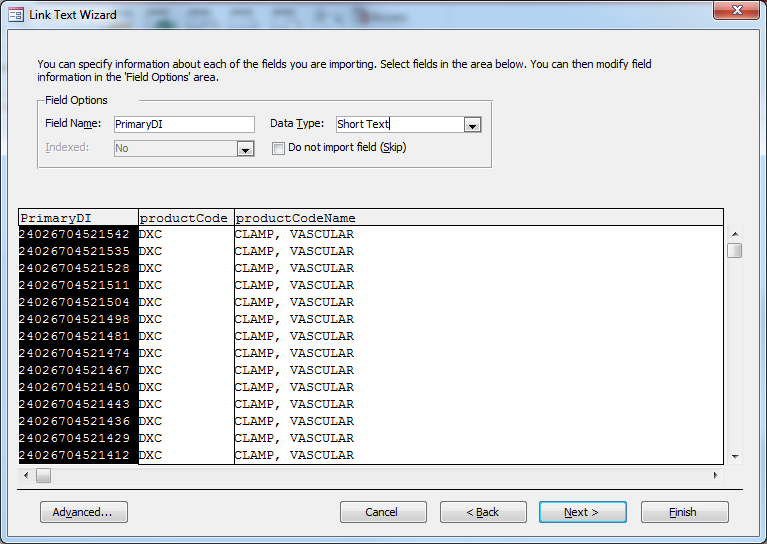
For each column you wish to import, choose the appropriate Data Type (For example, the Primary DI would be Short Text format and the Device Description and GMDN PT Definition would be Long Text format).
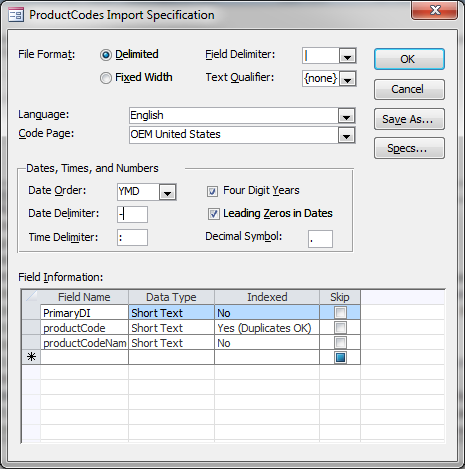
For dates, click on Advanced. Change the Date Order toYMD, check the Four Digit Years and Leading Zeros in Dates, and change the Date Delimiter to-. Click OK, then Click Next.
-
Name the table your desired name. Click Finish.

- Repeat from Step 2 for each file you wish to import.
-
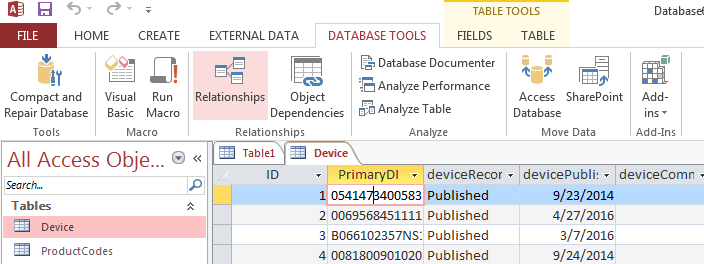
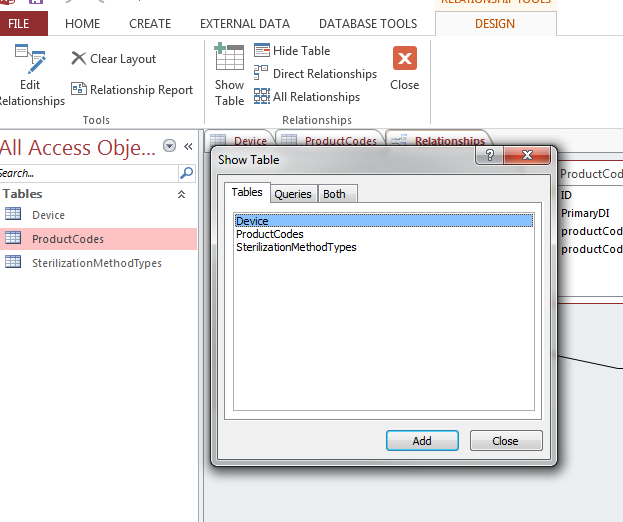
To link the tables, Open the Database Tools Tab in the ribbon, click the Relationships button.
-
Select each of the tables you want to link to, and press Add.
If the Show Table dialog does not appear, click the Show Table button in the ribbon.
-
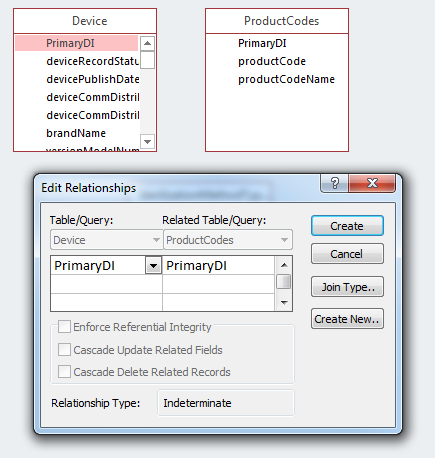
Click and drag the PrimaryDI from the Device table intothe PrimaryDI of another table. In the Edit Relationships window, make sure it is mapping PrimaryDI to PrimaryDI and press OK.
-
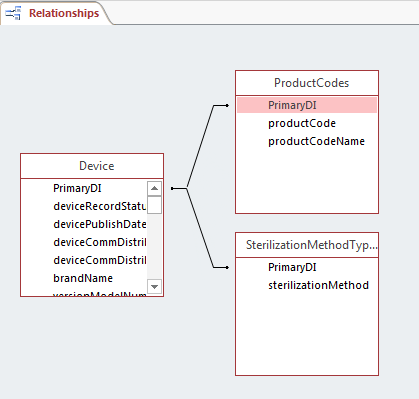
Repeat the previous step for each table until you have linked all the tables to the main Device table.
External Tools and References
| Technology | Notes | Link(s) |
|---|---|---|
| Microsoft Access | Official size limitations for Microsoft Access | Access 2016 Specifications |